Another 250mm F/4 mirror.
Preface
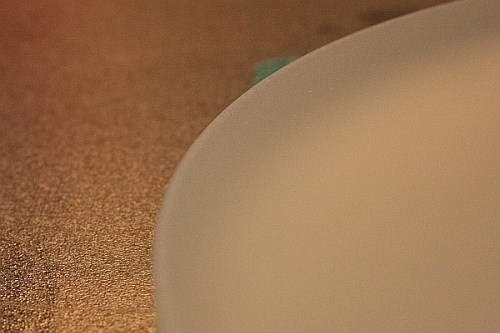
Well, the floatglass version hasn't survived the coating clock, pity since it was the piece of glass I started my grinding career with back in 2000. So here is a new attempt, the substrate now is BoroSilicate, 255mm diameter and 25mm thickness.
Grinding
The grinding seems much harder with pyrex compared with the window glass previously used.


What can be said, it's just another time going down through the grits. At least there is a good use for an ashtray!
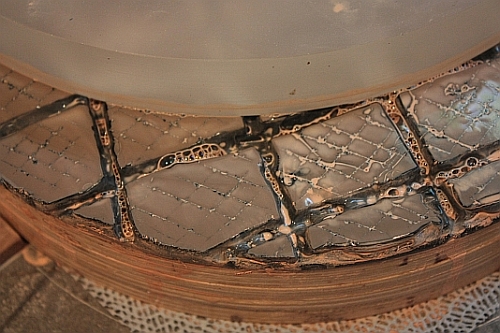
As usual, #80 carbo is used for hogging. Tiletool is made with glass tile mat and casting plaster. Cut this in with some more #80 until sagitta is almost reached. There is still a flat edge, and #180 is used to approach the sphere.

After a while MOT with #320 it seems that the edge is still a bit low, since it lags with respect to the rest. This is seen more often and in fact indicates insufficient #180 wets have been done. Next time check for full contact!
Nevertheless, the edge also catches up after some wets. It is not a big deal, since the center actually has suffered more from course grinding damage. Just go a few wets beyond a smooth surface, and the shape will be spherical and ready for the #600.
Polishing
In the polishing log % of radius and % of overhang are used intermittently. With overhang, using circular strokes, the percentage relates to the mirror diameter. When indicating a zone, the percentage relates to the radius of the mirror. So, 30% overhang means that the 40% zone is over the edge of the tool.
This notation has grown historically, and is similar to talking about 1/3 diameter linear strokes which have a 1/6 diameter overhang on either side down to the 70% zone.
The polishing starts after grinding down to #600, #800 and #1200, with polishing pads stuck on the grinding tool. It allows for a quick pre-polish, sufficient to determine the RoC at 1986mm. It is only a few mm shorter that the previous version, which is borderline OK since the blank is about 7mm thicker.


After the pads a proper tool was made, for the first time on a wooden (birch ply) base. The base center was lifted a bit with a 3mm central disk, sanded down at teh edges, to better match the mirror curve. Pitch thickness is about 8mm, fairly thick but probably acting a bit softer and better matching the glass curve.

After about two hours of polishing, the surface is getting smoother, but not yet there. The laser dot still shows and indicates that final finish will take some more hours... It is remarkable that you can actually see some scatter inside the glass, indicating inhomogeneities.

The edge appears to be the hardest part to get in order, too many remaining pits from fine grinding; in other words I started polishing too quickly... The cure I applied is narrow TOT circles, up to around 10% diameter overhang, with a 5kg weight on the tool. About two hours later the surface looks like left below.


The edge is still a bit low, although there also is a clear diffraction ring. Furthermore the central portion is slightly elevated. The following treat has gone back to MOT, a half hour or so doing slightly wider circles (about D/6), resulting in the middle image above.
The changes are fairly dim, but with the knife position as it is the low edge seems to have changed in a rim. So the next round is TOT again, but with wider moves in order to attack the outer regions. The right image shows the result of this, indeed the edge is lowered, in fact it is rolled down now...
So back to short moves and measure after an hour or so. The central elevation is ignored for now, since it will be quickly absorbed when the parabolization starts.


Above, the result after 20 minutes TOT and 20 minutes MOT, around D/10 overhang: the ridge along the edge has returned. Next start towards parabolization, deepen the center and see how the edge blends in. After half an hour of average D/5 overhang, MOT no weight, the central hill has grown and the ridge at the edge has lowered into a rolled don edge... Another half hour of increased overhang (30% average) the result indeed shows the work done at 30% (middle image). Parabolization is also setting in, so the goal is to go for correction and widen the strokes to 35% - 40%.
After 30 more minutes 35-40% wide strokes, parabolization is proceeding (right image above): the center focuses 1.2mm shorter than the edge zones. Target is h2/2R = 3.9mm. The center progresses rapidly, maybe best to stick with 35% and in any case stay below 40% overhang.


Half an hour on 35% strokes the correction has proceeded to 1.6mm. The center looks a bit flat, so some more 40% must be blended in.
Half an hour later, mostly 35-40% overhang MoT, the correction has increased to 2.5mm (middle image). One more 30minute session and we need to start taking measurements. It seems that the outer regions are not getting a lot of polishing done...


A range of foucaultgrams, at different zones, measure 6.22, 7.27, 8.69 and 9.40 mm respectively for a course determination of the shape. Estimating the zone radii I get to 30%, 40%, 55% and perhaps 70%.

The correction indeed has only impacted the inner zones, and needs to get propagated outwards with less overhang strokes. One worrying feature on the surface (or maybe on the back) of the mirror is at 1 o'clock 30% radius. This is also visible in earlier foucaultgrams.
Next time also some igrams will be taken to get better absolute surface info.

|  02 After 20 min MOT, mostly around 30%, sparsely 40%, many times 20%. Conic is -0.74. |

|  03 After 15 min more of the same. Center is slowly deepening, now at -0.83 conic. Need to move the correction outwards, either by less overhang or maybe first correct the edge with some 30% or so TOT. |

|  04 After 15 min more of the same, but narrowing overhang to around 20-25%. Next will be 30% TOT for 5min or so, to see what the effect is. |

|  05 After 5 min up to 30% TOT, not much change. So strategy should be to continue deepening the central regions and propagate correction outwards. |

|  06 After 20 min up to 40% MOT, averaging around 30%. At times some 10% overhang work as well. Curve improves, do one more such session, then get more accurate analysis with Bath/OpenFringe. Conic is at -0.90 now. |

|  07 After 20 min up to 40% MOT, averaging around 25%. At times some 10% overhang work as well. Curve got shallower, need to do wider strokes still instead of narrower. Conic is at -0.85 now. |

|  08 After 15 min up to 40% MOT, averaging around 35%. Wider strokers deepen the center, adding to overall correction. Conic is back at -0.90. Need to do this some more... |

|  09 After 15 min up to 40% MOT, sometimes 45%, averaging around 35%. Conic is now best fit -0.96. Next move is a shorter session and closer to 30% average overhang. |

|  10 After 10 min up to 40% MOT, sometimes 45%, averaging around 30%. Conic is now best fit -0.98. The correction needs to be propagated outward. Since the ridge is now over the 60% zone, overhang should concentrate more below 30%. For the time stop with >40%. |

| The interferometric analysis of the surface after session 10 shows about the same curve as measured with Foucault. This gives a bit more confidence in the Foucault measurements. Funny that Figure XP overestimates the correction, probably due to the lack of proper center data; there appears to be a hill... Concluding: do not stop with occasional 45% overhang, but spread the strokes a bit more towards 15% at times. |

| 11 After 10 min varying between >40% and <20% overhang, less intermediate. The surface analysis shows that the central hill is mostly gone, the deep 80% zone is still there though. The center must get lower as a whole. Strategy is to concentrate more on 20% overhang strokes, but still with some excursions to more. |

| 12 After 10 min approximately 20% overhang, few up to 40%. The surface analysis shows that the central region slowly approaches the level of the 90% zone. Also the central hill is lagging, so a bit more large overhang strokes are needed. Approximately 15 minutes. |

| 13 After 15 min less than 20% overhang, also some up to 40%. The surface analysis shows that the 90% zone is coming up. The central hill is growing though, so some more attention should go to larger overhang strokes, 35% and more. Just keep deepening the central region, and the edge will blend in automatically. Approximately 10 minutes. |

| 14 After 10 min around 35% overhang, some times <20%. The surface analysis shows slight improvement. Need to do a longer session with more excursions to >40%. |

| 15 After 20 min around 35%-40% overhang, some times <20%, slowly getting there. Do this one more time, put some more 15% in as well. |

| 16 After 15 min same recipe. Need to get rid of the central hill, then flatten the outer zones with some ToT. |

| 17 After 5 min accentuated on center, average 40%. This is tricky, it can overshoot easily. |

| 18 About 10 min of the same stroke, now the hill is definitely gone... Also enriched the slurry with some more CeO. Do some more 30% overhang to straighten out the center 50% or so, before treating the edge. |

| 19 About 5 min of around 35%, center is smoothing. Now let's try some ToT, center of the tool over the 80% zone. |

| 20 About 5 min ToT center over 75% zone. Pressure is quite minimal, light tool. Not a lot has changed, so next time try with some weight added over the center of the tool. Star test confirms the Open Fringe report, in that it is a bit hairy outside of focus, pointing at undercorrection. The diffraction pattern looks very nicely circular though, no discernible trefoil as suggested in the report. Need to do an 8-orientation Bath test to get a more accurate analysis, before deciding how to proceed. |

| This analysis is based on 8 mirror orientations instead of 4. There's not a whole lot of difference, some more structure in the center. Anyway, it seems like a good idea to work some more on overall correction first, i.e. >30% strokes. |

| 21 About 5 min MoT averaging on about 30% overhang. Difference is quite marginal, so let's do another 10 minutes, slightly wider stroke. |

| 22 About 10 min MoT averaging on about 35% overhang, things got worse. Apparently, forcing more correction requires 35% - 40% only, not narrowing to less. Maybe the edge should also be treated with some ToT, edge over the 0.1D ring (80% zone), using accentuated pressure. |

| 23 One round of ToT accentuated over 80% radius zone and 5 min MoT 35%-40% diameter overhang. Heading back in the right direction... It can have another 10 min or so, and probably also a round or two more with ToT. |

| 24 About 10 min 35% - 40% diameter overhang, and one round of ToT accentuated over 80% radius zone. Measurement was a bit sloppy, so just deduce tendency. It can use some more ToT over the 80% zone, do two or three rounds. Also some more 35% overhang MoT. |

| 25 About 10 min 30% - 35% diameter overhang, and two rounds of ToT accentuated over 80% radius zone. |

| 26 About four rounds 45% diameter overhang, and two rounds of ToT accentuated over 80% radius zone. The high 80% zone is sloooowly cutting away, needs some more dedicated work. Don't forget to also keep down the center. |

| 27 About five minutes 35% diameter overhang, and four rounds of ToT accentuated over 80% radius zone. Decreasing focus with about 1/4 wave rises the central hill but leaves a nice edge. So now we'll focus on deepening the center again, starting with 10 minutes >35% diameter overhang. |

| 28 About 10 minutes >35% diameter up to 50% overhang, the correction starts to catch up again. Do some more but spend less time at 45% or more overhang. |

| 29 About 10 minutes >35% diameter overhang, the correction has overshot. Do some ToT on 80% radius, as in 23-26, and some 30% diameter overhang MoT. |

| 30 About 5 minutes around 30% diameter overhang, the correction is creeping back. Do some more of this. |

| 31 About 5 minutes around 30% diameter overhang, and a short 80% radius ToT, the correction is not really changing. I think the high 80% zone should come down a bit more, so let's try some ToT again, but push down the tool a little harder. Do also some more 30% overhang MoT. |

| 32 About 5-10 minutes 30% - 35% diameter overhang, and a short 80% radius ToT with some more pressure over the tool edge. Do one more time, blending in down to 25% overhang as well, to also get 50% zone down. |

| 33 About 5 minutes 25% - 35% diameter overhang, and a single round 80% radius ToT with some more pressure over the tool edge. Center has smoothed out but there's a 70% zone trench right now, bummer. Do some more 35% - 40% to deepen the curve again, do not touch the 25% anymore. |

| 34 About 7 minutes 35%-40% overhang. Need to get the 50% zone down, maybe a bit narrower strokes, down to 30% again. So 5 more minutes 30% to 40% strokes. |

| 35 About 5 minutes 30%-40% overhang later, the surface is becoming acceptable now. Still the trench at 70% radius is not very nice, but probably not very visible in the intended wide-field use. Surface analysis is result of 4 measurements at 8 orientations, averaged, derotated and averaged. |

| 36 After 5 minutes 30%-40% overhang. |

| 37 After 10 minutes low 30% and some 45% overhang (~1 in 10 rounds). The limiting factor for the Strehl remains the high 90% and low 70% zones. The low 30% strokes don't seem to sort a lot of effect. Maybe I should focus a bit more on the outer zone first and do some ToT sessions. |

| 38 After 10 minutes low 35% to 40%, some 45%. Overshot, do edge more and some low 30%. |

| 39 After one round edge treatment, some wide ToT and 5 minutes low 30%. Getting better, more of the edge treat and try some accentuated over 50% zone. Close with some 35%. |

| 40 A round of 90% and a round of 50% zone treatment, ToT. Followed by some 35% overhang MoT smoothing. Do a bit more... |

| 41 A bit more later, at least the 50% zone has gone down. It seems to become a bit hairsplitting, but still lets do some more edge treat and than deepen the center again somewhat with >35% MoT. |

| 42 Well, not a lot is changing, I think I call it a mirror. Not a planet killer but at 92% Strehl it will be very good for its purpose, wide field imaging. The deviations from the paraboloid are all within a band of λ/8 on the wavefront. To evaluate roughness a Foucault test needs to be done, as well as a startest for final performance evaluation. |
   | The foucault images show a farly smooth surface, except for a small ring in the central area. This will be hidden behind the secondary though. |