Mirror set for Kutter 150mm F/24, mk-II
Preparations
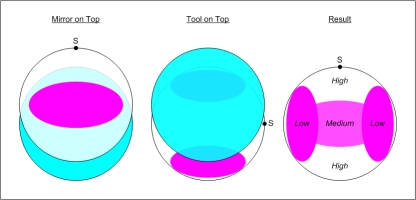
Toroidization of the primary mirror in itself worked, but only roughly. It has proven to be quite hard to obtain the toroid correction and at the same time maintain a smooth figure. Smoothness of the primary is important especially for this type of telescope, since it is mainly used at relatively high magnification.Instead, Kutters' original ideas are probably the better choice, that is, correct the secondary mirror or use a correction lens as a third optical element.
The second attempt at a 150mm F/24 mirror set aims at re-figuring the mirrors and have them fit in the same system assembly. There are several possible approaches to correction through the secondary:
- The secondary can be left uncorrected and a fairly large (probably unacceptable) amount of coma will remain.
- When some coma is accepted, comparable to the standard 150mm anastigmatic design, secondary correction of only 1 fringe is required, sagittal curvature of 4490mm.
- Full compensation of astigmatism in an almost coma-free configuration gives the best results, but results in a physically larger system and requires significant toroidisation. The secondary sagittal RoC must be 4410mm, which means about 4 fringes on each side.
Spot diagrams for half of a 0.2° field of view:

The plan is to first bring the primary back to spherical, with identical curvature as the secondary (4520mm). This can be tried out in the system assembly with a modified φ2 (φ2=6.5°, first variant). Then the secondary can be given a slightly toroid figure, of only one fringe at each side of a center line. The shorter radius is to be oriented in sagittal direction, i.e. perpendicular to the Z shape of the rays (φ2=8.0°, second variant). The third variant (φ2=11.4°) will probably not be neccessary.
Re-figuring the primary
So, the strategy is to start with reverting the 15mm RoC difference by repeating the toroidization strokes but at 90° rotated orientation. The high parts should come down and the low parts should come up then, bringing the shape close to spherical again.
The figure will be rough at first, but switching over to ToT circular strokes the roughness should be gradually polished out.
The log is quite detailed, to keep track of the effect that different circular strokes have.
 |
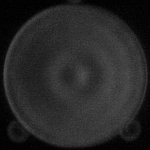
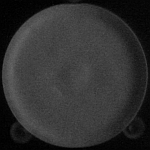
1 After about three hours of work, the figure has developed as in the above (bad) image. The center portion horizontally (previously long RoC direction) has now equal RoC as the vertically (previously 'S' RoC direction). Where the vertical direction shows pretty much spherical when the mirror is 90° rotated, the horizontal direction has high areas near the edge. One could say that the action has overshot its goal, and some reverting ToT strokes are in order to bring the high parts down. Then smoothing and correction of the turned edge... | ||
 |
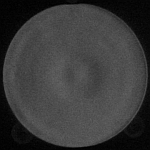
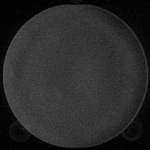
2 Astigmatism is pretty effectively removed after about half an hour correction and an hour of smoothing. There remains a ridge along the edge that needs dedicated treatment, short ToT strokes with accentuated pressure on the tool edge over the faulty zone. | ||
 |
| ||
 |
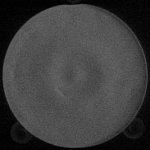
4 Two rounds of raised edge and one round of TDE treatment. Edge seems slightly improved | ||
 |
| ||
 |
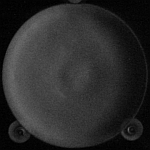
6 One round of TDE treatment and half hour of narrow (D/10) MoT circular moves. This is working, but slowly, so let's do one more hour. | ||
 |
7 A half hour of very narrow (<D/10) MoT circular moves. The shape is now oblate, with a narrow low edge. Since a diffraction ring is present all around, the TDE is not as bad as it seems. Some high edge removal strokes are in order now, followed by normalizing MoT circles of about 25% D overhang. | ||
 |
8 One round of raised edge treatment and about 10minutes of avg D/4 MoT circular moves. The edge is no longer really truned down, but there is a short focusing ring just inside. So let's do the raised edge repair strokes some more. RoC is now approximately 4495mm. | ||
 |
9 Two rounds of raised edge treatment. Edge seems to be turning down again, so continue with less pressure on overhang part, and more inside the mirror edge. | ||
 |
10 Two rounds of TDE treatment. Nothing changes. | ||
 |
11 Half hour of avg D/4 ToT. Edge zone widens... | ||
 |
12 Several rounds of TDE treatment, accentuated pressure inside as well as on overhanging part of the tool. I think the edge is softening and some more is in order, until the edge is OK. | ||
 |
13 Several rounds of TDE treatment, accentuated pressure inside as well as on overhanging part of the tool. | ||
 |
14 About 25 minutes ToT avg 25% - 30% overhang. Getting there, do 30 or so minutes more. | ||
 |
15 About 25 minutes ToT avg 25% - 30% overhang. Switch to MoT little overhang + somewider to smooth out. | ||
 |
16 About 10 minutes MoT <5% overhang, mixed with 25% smoothing strokes. Visually there is hardly any visible lowering of the edge, but on the photo for some reason it is quite persistent. Also two scratches are visible, which were made during the last polish session. |


  |
17 About 25 minutes ToT avg 25% overhang. Different camera, two ways of looking at the low edge zone. Try wider ToT strokes to work more on the edge. |
  |
18 About 25 minutes ToT avg 35% overhang. The wider strokes actually have made the problem worse, this is something not to repeat. Go back to accentuated pressure ToT inside mirror edge, as suggested above in session 5. |
  |
19 Four rounds of TDE treatment. Going in the right direction. |
  |
20 Four more rounds of TDE treatment. Second image insufficiently defocused, but still moving in right direction. Some roughness introduced, so next round will need to do some MoT D/4 smoothing strokes. |
  |
21 Narrow MoT circles 5% overhang (10min) and smoothing 25% overhang (10min). Still a bit rough, maybe air currents, but edge becomes narrower. |
  |
22 Same thing, 20 min in total. TDE still narrowing. Need to get rid of that ridge at 25% radius, probably some 40% overhang circles are enough. Careful to not deepen center too much... |
  |
23 Same thing, 30 min in total. TDE almost gone now, time to widen stroke or do some ToT. |
 |
24 About 8min 10% overhang ToT. Better still do some more narrow MoT (10 min or so), and a couple of 40% strokes to flatten the center a bit more. RoC is a bit longer now, 4507mm. At F/15 the right RoC is fairly undefined, I estimate the spread to be about +/- 1mm. This also causes the smallest surface deviations to clearly stand out. |
  |
25 About 8min 5% overhang MoT, a few wider 40% strokes too. Ronchi image is inside RoC, very hard to make due to interference effects, too high line frequency Edge is more narrow but seems effectively turned up now. Let's try some ToT and try to flatten the edge. |
  |
26 About 5min 20% overhang ToT, using a 5kg weight in the first minute. Used slightly longer shutter on the right image. The features seem to have smoothed out somewhat, but an apparent risk is to turn the edge down again. Overall the mirror lookss fairly good now, I might consider to leave it like this... |
  |
27 About 12min 20% overhang ToT, using a 1kg weight on the central 50%. Right image few mm outside RoC. It seems that the TDE is still there, probably has been all along but somewhat shielded by the low zone just inside. Reverting to narrow MoT may not work as well, since it avoids the edge. It will probably re-create the rised zone. Mybe the better way is to pursue the ToT with a weight and propagate the TDE inwards (or: lengthen the RoC). |
  |
28 A half hour 20% overhang ToT, using a 1kg weight on the central 50%. As can be seen the outer zones get lower, hopefully levelling with the TDE ultimately. Not there yet, do some more. |
  |
29 40 minutes 20%-25% overhang ToT, no additional weight. Seems we're back on square 18... This seems not the way to go, so revert to MoT to correct this, narrow strokes at first and then wider. |
  |
30 20 minutes 5% overhang MoT, half of it with 5kg weight. Reversion in progress, do some more! |
  |
31 Half hour 5% overhang MoT, half of it with 5kg weight. TDE is mostly gone, but a fair amount of roughness remains. Ridges on 20% and on 80% zones. Right image after few more minutes 10% and 40% overhang strokes. Let's try some strokes as in 26 and 27 to smooth things out. |
  |
32 10 minutes avg 20% with 1kg weight. Need some more, say half hour, and switch to MoT after 15min. |
  |
33 Half hour, 15min ToT avg 20% with 1kg weight, 15 MoT avg 20% no weight. Things are smoothing out, still need more narrow MoT strokes since TDE is not entirely gone... |
  |
34 5min MoT narrow, 5min ToT 20-25%, 5min MoT 20-25%, and once again (total 30min) Surface does get smoother, only it is not clear which part extends the turned edge now... Once again, but use 5kg when doing the narrow MoT strokes. Also it might be better to push the ToT not too wide, as this has appeared to widen the bad edge in previous sessions. |
  |
35 5min MoT narrow (5kg), 5min ToT 10%, 5min MoT 20-25%, and once again (total 30min) TDE is largely gone now, surface a bit rough though. So let's do some alternate ToT 10% and MoT 25%. Also it is time to carefully attack the central hill, with some wide 40% MoT. |
  |
36 20 min alternating 10% ToT and 20% MoT, also blend in some 40% MoT Surface smoother, still some edgie. Lets still do some more weighted narrow MoT and smooth again as in 36. |
  |
37 5 min narrow MoT with 5kg, followed by 10% ToT and 25% MoT smooting, some 40% wide strokes Now I remember why I don't like to work ToT: SCREeEeETCH!. Resulting in a nice set of scratches on the almost finished surface, major bummer. Still surface seems smoother overall, TDE also smooths into rolled edge, wide strokes cause low 30% zone. |
  |
38 10 min narrow MoT with 5kg Edge now curls up, low ridge at 85% and still the central ridge at 25% or so. Do some MoT smoothing and wide strokes. |
  |
39 After 10-15 min MoT avg 25%, no weight. Outer 15% zone is a trench. Need to lower the central 85% and smooth at the same time: MoT D/10 - D/4 overhang, about 20min to start with. |
  |
40 After 20 min MoT 10-25%, no weight. So now the curvature of the center has increased while the outer region has hardly been touched. Apparently it is better still to alternate MoT and ToT. So next 20 min lets try 10% overhang ToT strokes. |
  |
41 After 15 min ToT 10-20%, 5 min MoT 10-20%, no weight. . |
  |
42 After 15 min ToT 10-20%, 5 min MoT 10%, no weight. . |
  |
43 After 15 min ToT 10-20%, 5 min MoT 10%, no weight. Need to push it a bit further towards the edge; widen ToT strokes. |
  |
44 After 20 min ToT avg 20%, no weight. Hmmm, edge gets worse; switch to MoT 5-15%. |
  |
45 After 15 min MoT avg 5-15%, no weight. Ridge moves outward, do it once more, but narrower strokes. |
  |
46 After 15 min MoT avg 5-10%, no weight. . |
  |
47 After 10 min alternating narrow MoT and ToT, no weight. Edge is turning up now, switch back to ToT, 10% overhang 10 min. |
  |
48 After 10 min 10% ToT, no weight. Needs some more ToT, maybe a bit wider. |
  |
49 After 8 min 10-20% ToT, no weight. . |
  |
50 After 10 min 10-20% ToT, no weight. . |
  |
51 About 10 min narrow MoT, 5kg weight. Left image a few mm inside RoC, right image at RoC. Lets see what ToT with weight does to the edge zones. |
  |
52 After 10 min up to 10% narrow ToT, 5kg weight. Once more... |
Well, that was it: ToT and 5kg have caused numerous scratches. Maybe the lap has gone sour, maybe there was pollution in the last bit of CeO, maybe interference with other activities, who knows? So I decided to rebuild the lap and start all over again. Hopefully the scratches are just sleeks and will polish out, otherwise the situation is even worse...
  |
01 After several warm and cold pressings, and a total of 30min MoT with weight. The drag became too much with the 5kg weight, so I replaced it with 1kg halfway through. The contact in the center is still somewhat lagging. Knife cuts in from the right. The central part focuses long, so it is too high. I need to widen the stroke to work the center a bit more. Also do some more warm pressing to improve contact. |
  |
02 A total of 30min MoT with weights, up to 25% overhang. High center decreases in size, do some more MoT and maybe some wider too. |
  |
03 10 min MoT with 1kg, 5 min without, up to 30% overhang. Slowly improving still; let's do another 15 minutes. |
  |
04 8 min MoT with 1kg, few minutes without, up to 30% overhang. Central hill appears to have grown, outer zones are rolling down. I guess the weight also functions in accentuating the center work. Next round do some more narrow strokes with 5kg, alternate with wide to tackle the center. |
  |
So it is time to try a startest, by means of a 10μm pinhole and a 10mm eyepiece. The magnification achieved with the current RoC is 450x. The airy disk of 1.8" would be about 40μm. Left image is the result, shot from the hand. On average the image looks fairly good, but the photo freezes the aircurrents. The first diffraction ring is where it should be, but the halo surrounding it is caused by the long focusing areas (center and edge). Concluding, the aberrations are fairly well visible and must be removed! Right image shows the setup, pinhole on top is illuminated from the rear with a laser module set to focus at 40mm instead of infinity. |
  |
05 15 min narrow MoT with 5kg. (T = 25°C) A bit too long, or too soft lap. Also the lap still doesn't seem to conform well in the center. Address the center with some wide MoT, 1kg weight. Then finish with some fairly narrow ToT to get the edge down again. |
  |
06 5 min wide (20-35%) MoT with 1kg, 5min ToT avg 10%. Center is OK now, edge needs to come down more. Startest also much improved, although the image dances madly, the faster shutter (1/250 at 1600ISO) freezes the aircurrents better. Do some more ToT a bit wider up to 20% or so. |
  |
07 5 min 10-20% ToT with 1kg. Not a lot of change, try some more wide MoT, and then some ToT. |
  |
08 5 min wide (20-35%) MoT with 1kg, 5 min 10-20% ToT no weight, (T=25°C). Edge zones getting better, first diffraction ring hardly visible. Do one more such session. |
  |
09 5 min wide (10-35%) MoT with 1kg, 5 min 10-20% ToT 1kg, (T=22°C). Slight hole in the center, edge is virtually untouched. Some milder overhang MoT (up to 25% or so), 10 min no weight, followed by a few min 15% ToT. |
  |
10 10 min 25% MoT, no weight, 5 min 10-20% ToT, no weight. Pretty much done, except for that stubborn low edge... Startest shows nice star image and a vague first ring. Inside and outside focus are identical, where the central maximum is replaced by a central minimum when defocused one or two mm. |
 |
A quick Bath igram at CoC seems to confirm the above, a narrow slightly raised zone towards the edge and a TDE of about 1/4 to 1/2 wave deep. |


The KE test redone, as can be seen above, from left to right increasingly pinching off the light. Also the Bath igrams and analysis have been redone, making sure that the igrams were all taken well on one side of the CoC. As can be seen in the detail (3rd) KE photo, the darkening just inside the diffraction ring is a bit magnified, giving doubts about the edge. It might be an artefact of the JPEG compression..

The DFTFringe analysis of 4 igrams shows a fairly good mirror, about 20nm RMS on the wavefront and 95% Strehl ratio, but with an estimated conic of -1.9! The slow mirror conic is very sensitive to the slightest surface deviation. Also there is a hint of astigmatism, might be due tobad equilibration during test.
Concuding, the mirror needs some more tweaking, some ToT with moderae overhang interleaved with a few MoT. Let's say 10 minutes, no longer using any weight.
11 After about 10 min mostly moderate overhang ToT, some MoT. Not a lot has changed.

The tool had not been used for a while, and I noticed that the outer zone has sunk, probably due to the hot weather. Need to prees longer and with more weight.
12 After about 10 min mostly moderate overhang ToT, some MoT, after a long press.

Shape is somewhat improving, conic is approximately -1.4 now. Do some more, widen MoT strokes to keep center down.
13 After about 10 min mostly moderate overhang ToT, some MoT, after a long press.


The low edge is less acute, the conic has been reduced to -0.8, Strehl ratio is 97%, RMS roughness 16nm on the wavefront mostly in the low edge and some astigmatism. I could try 5 more minutes of moderate ToT strokes. Maybe some directed astig tackling could be beneficial as well: the axis between high edges runs from 210° to 30°.
14 After about 5 min mostly moderate overhang ToT, some MoT, after a long press. Some longer oval strokes in the direction of the high astigmatig parts.


Not a lot has changed, really. Let's try another 10 min session, blend in some widish MoT to lower the central hill.
15 After about 10 min mostly moderate overhang ToT, some MoT, after a long press. Some longer strokes in the direction of the high astigmatig parts. Before session the lap was re-channeled, hence it pressed better into contact.

The figure is now close to ideal, the astigmatism has almost gone and a conic of -0.5 is OK. The RMS error is now λ/50 and the Strehl more than 98%.
Refiguring the secondary
 | Fringe testing of the secondary on the primary shows a delta height of approximately 8 fringes (green laser, 532nm), center to edge. This amounts to approximately 2.1μm, where the secondary RoC is larger than the primary RoC. Rough calculation yields: Rp=4494mm (sag=0.136295mm) and Rs=4564mm (sag=0.134195mm). Concluding, the RoC of the secondary needs to be brought back with ToT strokes. There should not be more than a fringe or so in difference. |
 | After several hours ToT to get the edge down and shorten the RoC, not a lot has changed. Still about 7 fringes, and the edge appears to be turned down. This can be seen in the fringes that straighten near the edge. But 7 fringes still amounts to 1.85μm, hence the Rs=4556mm. So, I think I will keep it that way, but improve the edge first. |
 | One more hour ToT interleaved with MoT, average overhang to converge to sphere. The edge has stretched a bit, shape seems almost spherical regarding the circular fringes, but now there are 9 fringes difference. The wavelength is the Hg 546nm lines in this igram, so now the Rs is about 4580mm. I will spend 30 minutes more, measure again and call it done. |
 | About 20 minutes ToT interleaved with MoT. The fringes are pretty much spherical, but there are now 12 fringes difference. The wavelength is the Hg 546nm line in this igram, so now the the Rs has stretched even further to 4605mm. Fortunately this does not change the telescope dimensions too much... So this is it, not worth while to put more time in it, to get the most out of the system I guess a corrector lens will be the way to go. But first let's test what we have now... |